13.4 Adding images and audio to your Spanish-to-English dictionary
Goal
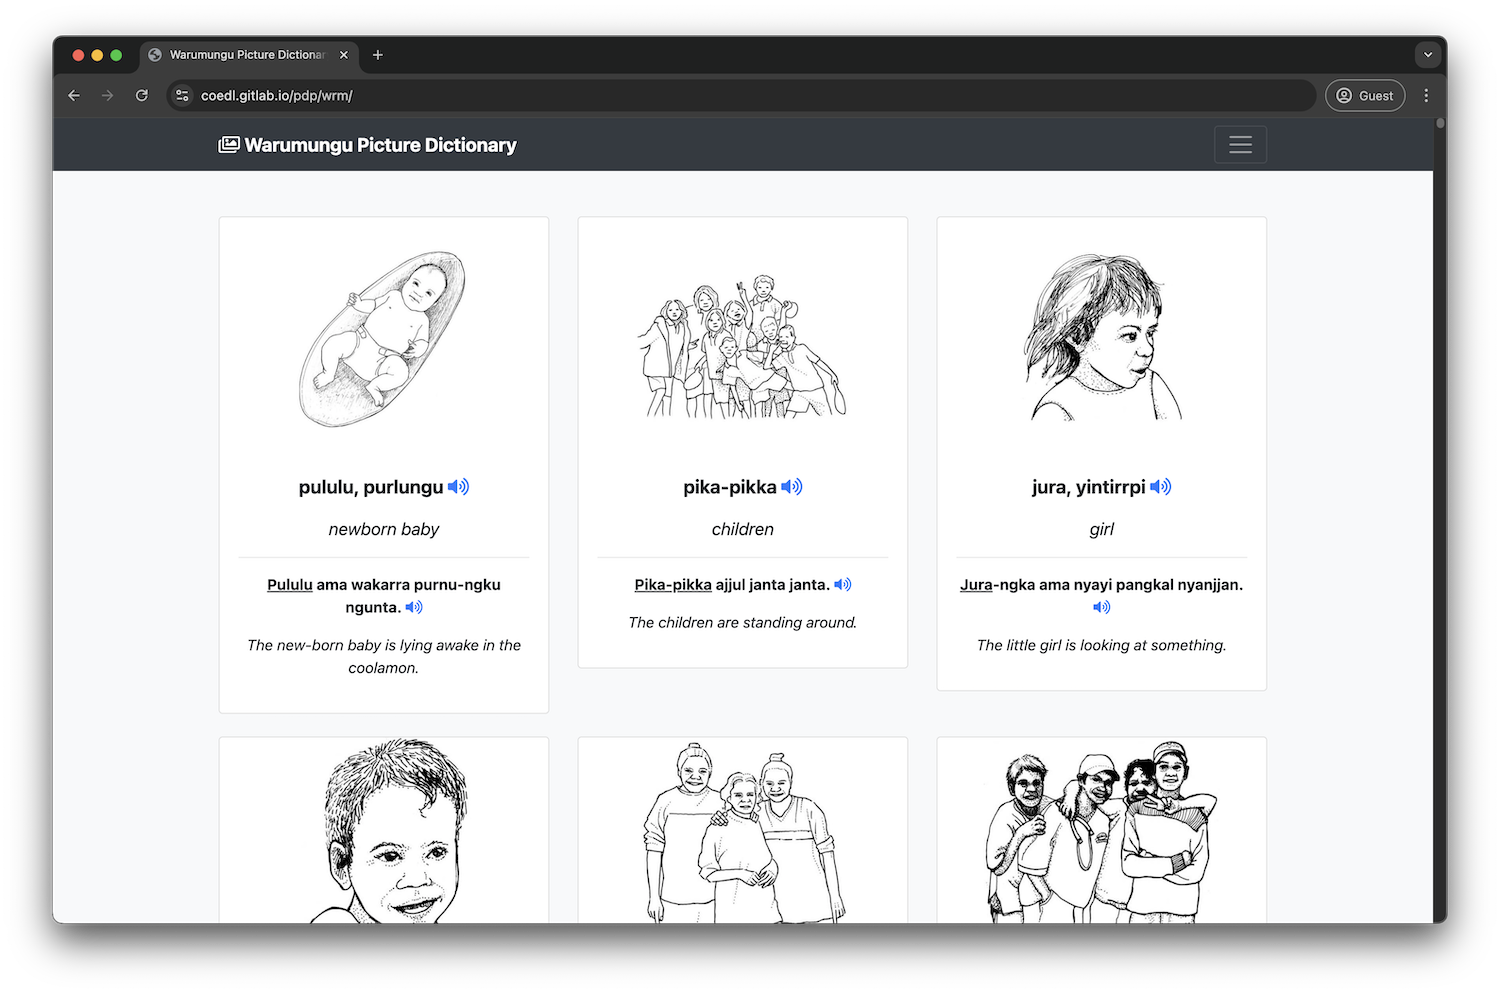
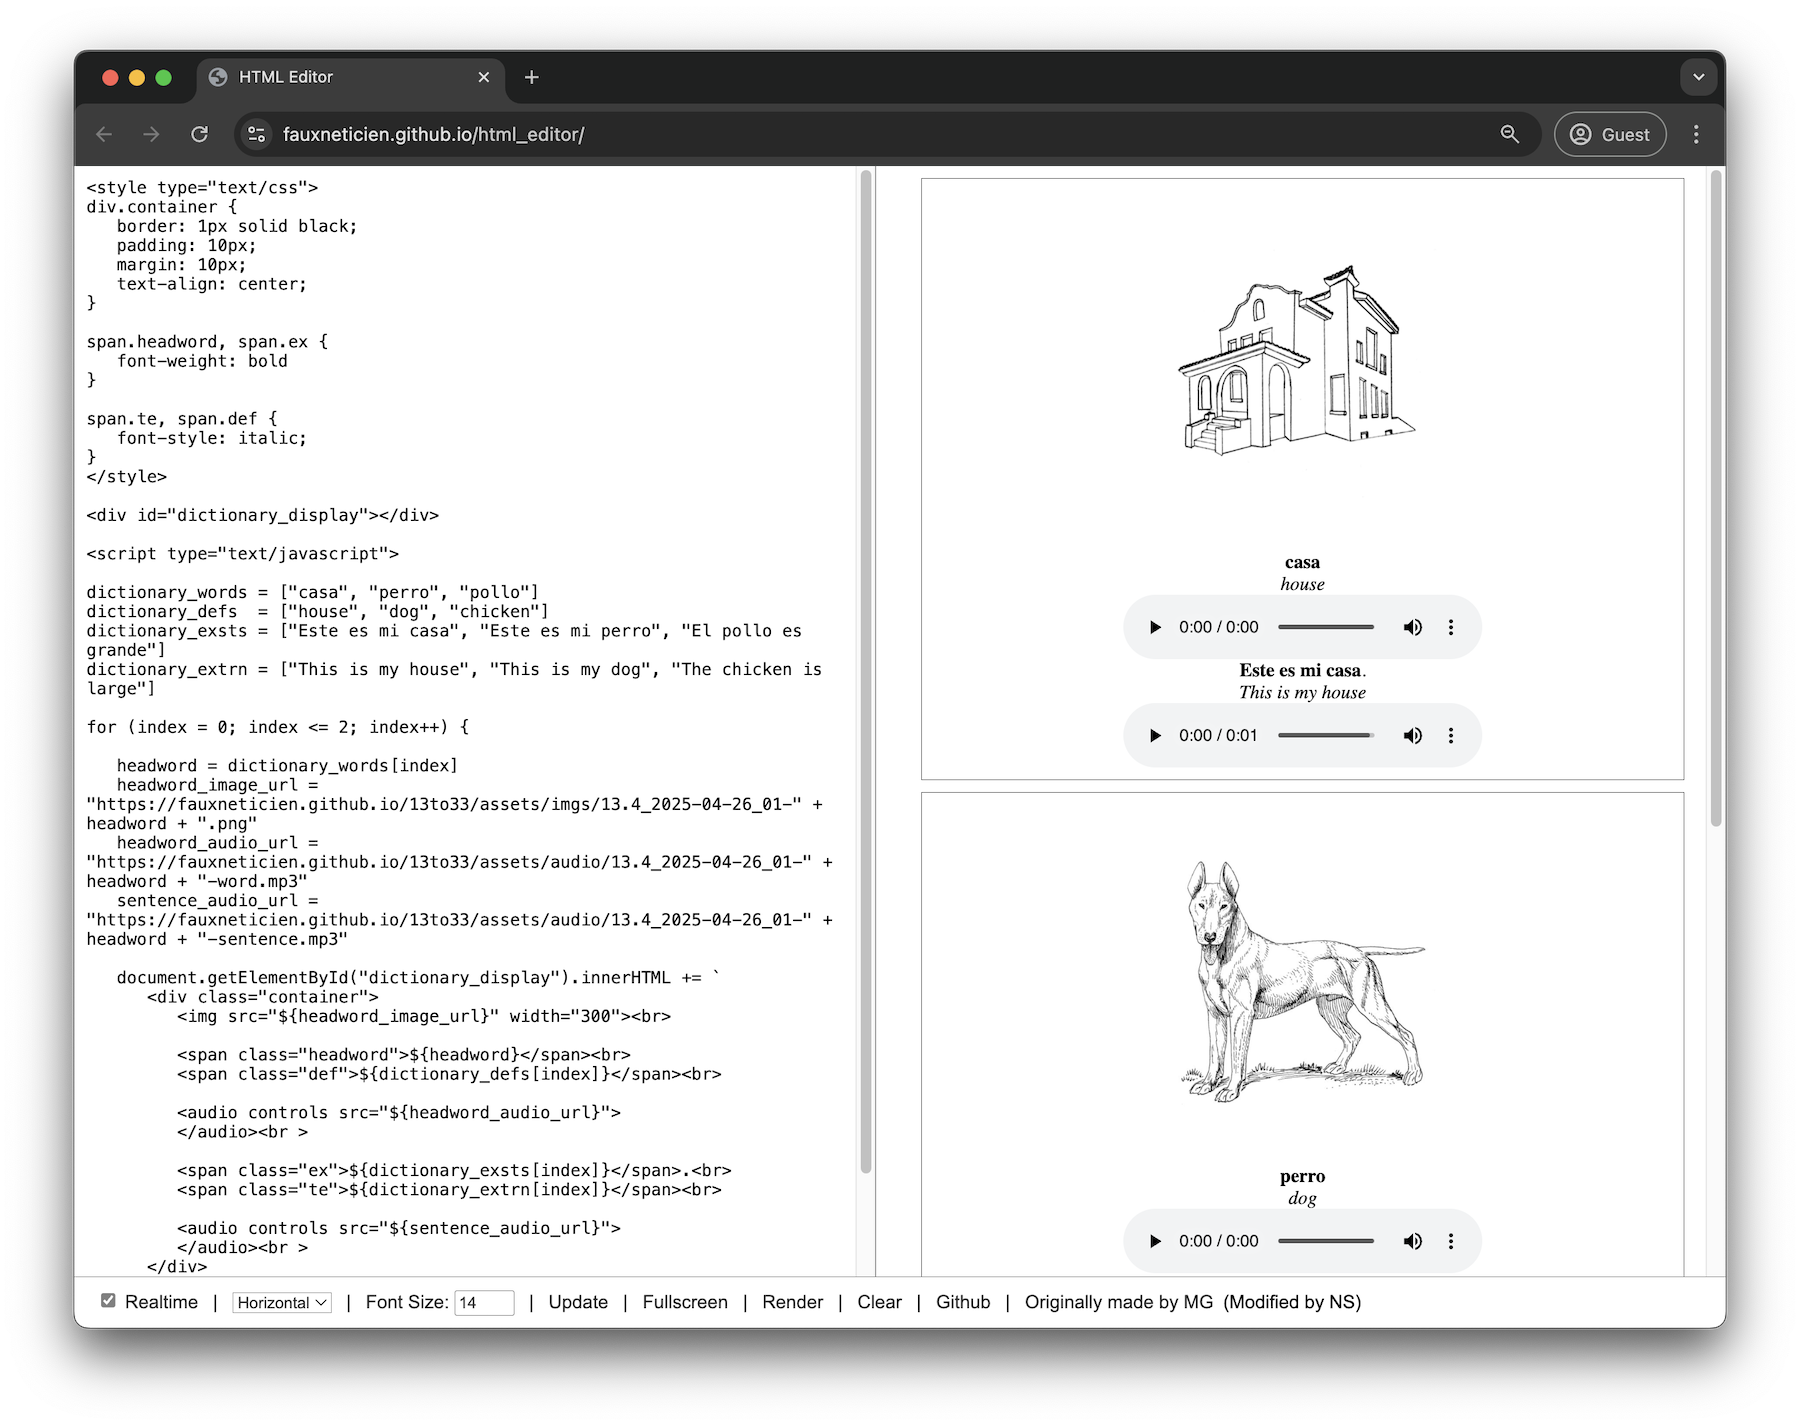
Now that we’ve learned how to display various text data (definition, parts of speech, etc.), let’s learn how to display images and audio alongside this text. By the end of this tutorial, you’ll have made a quick Spanish approximation of the Warumungu Picture Dictionary:
Adding media
Adding media (images or audio) is as simple as using the correct HTML tag (respectively: img or audio) with an attribute src (short for ‘source’).
Adding images
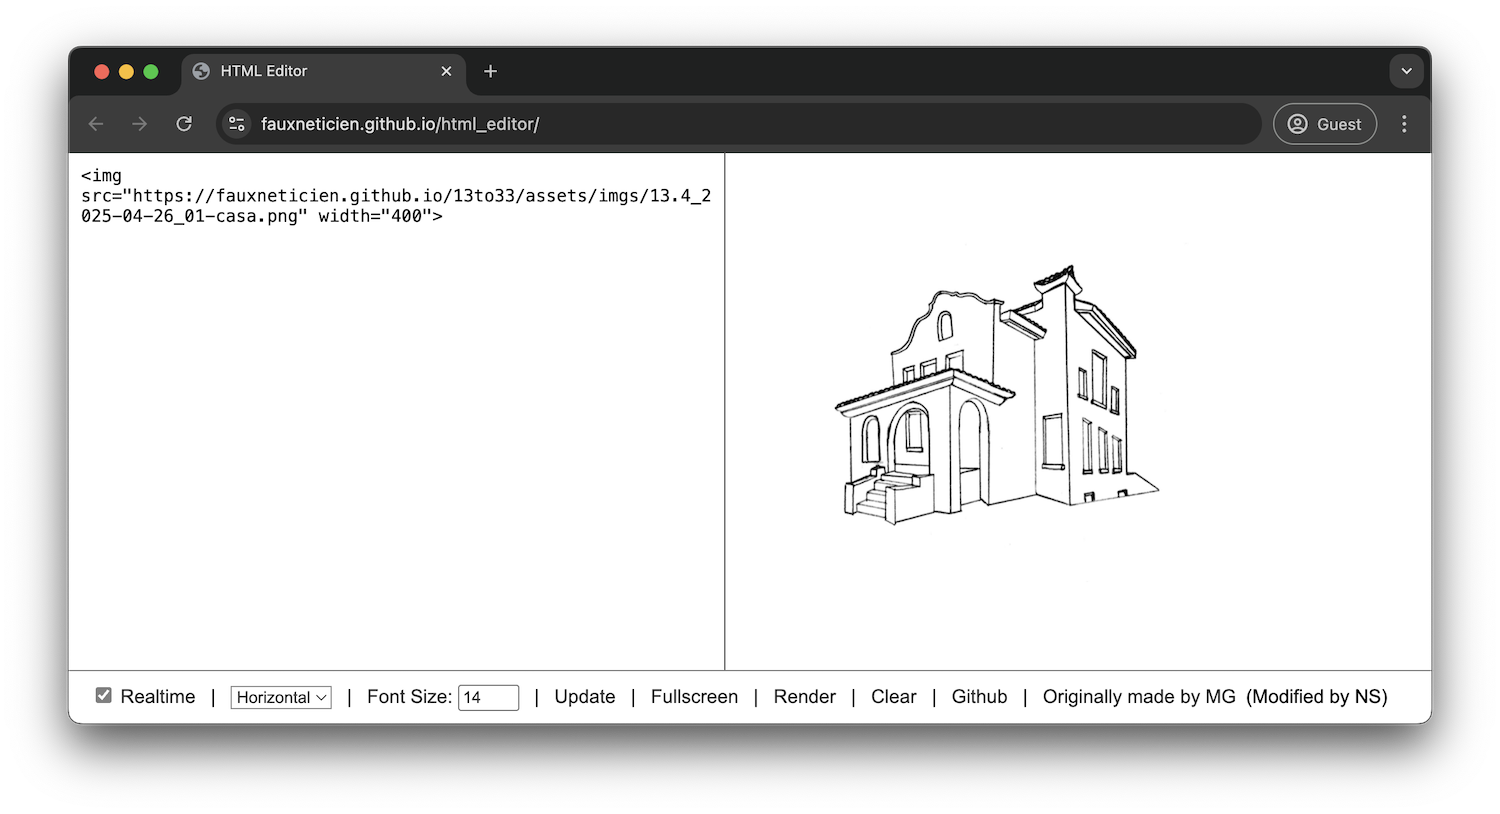
Using our online editor at https://fauxneticien.github.io/html_editor/, we can enter in the following snippet where the img tag specifies that the browser should display the image located at https://fauxneticien.github.io/13to33/assets/imgs/13.4_2025-04-26_01-casa.png (and at a width of 400 pixels, an optional specification to re-size it for the small window in our online editor).
<img src="https://fauxneticien.github.io/13to33/assets/imgs/13.4_2025-04-26_01-casa.png" width="400">
Adding audio
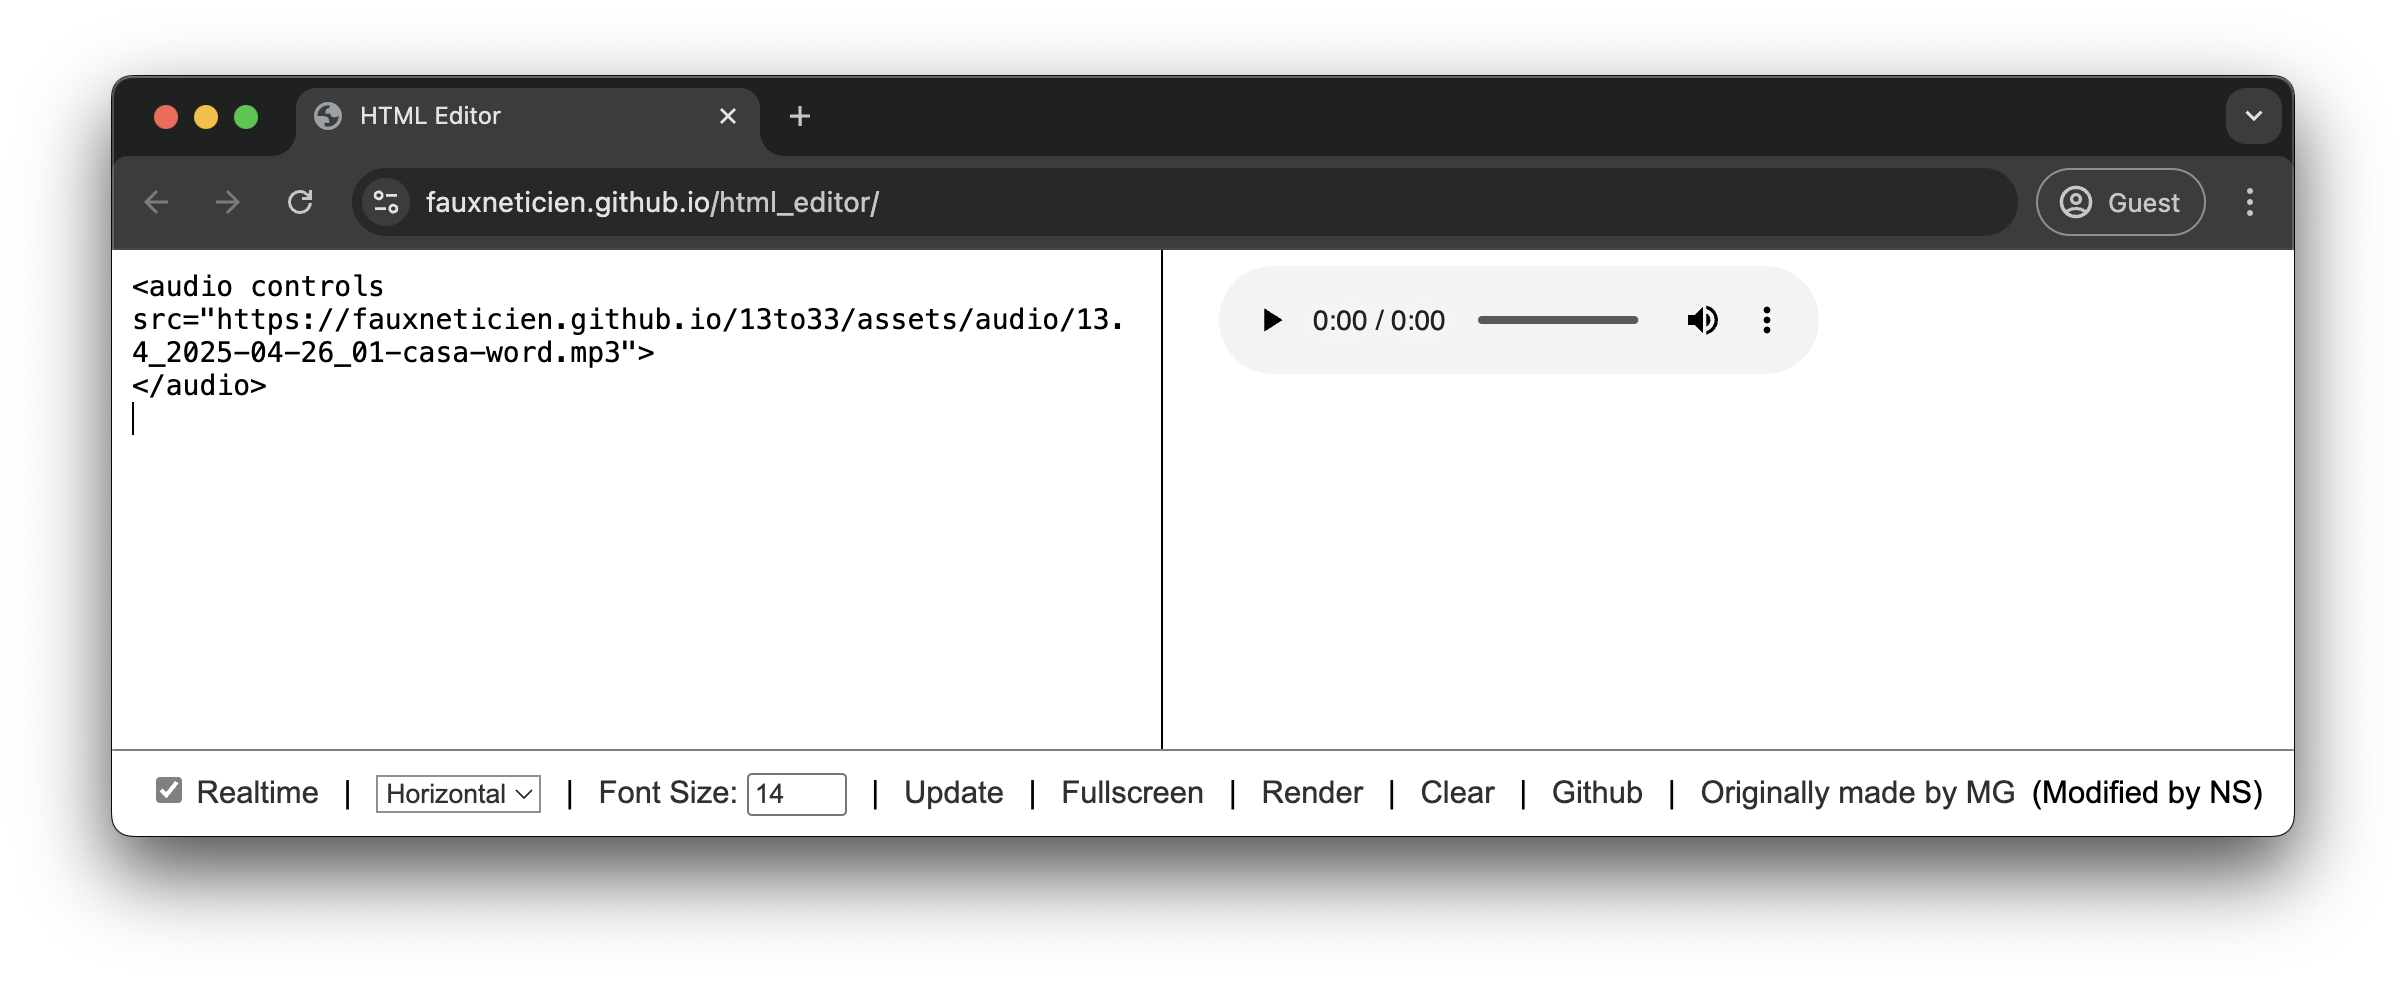
Similarly, we can add audio using the audio tag with the src specifying the location of an audio file (e.g. https://fauxneticien.github.io/13to33/assets/audio/13.4_2025-04-26_01-casa-word.mp3).
<audio controls src="https://fauxneticien.github.io/13to33/assets/audio/13.4_2025-04-26_01-casa-word.mp3">
</audio>
Some notes on the audio tag:
- For now, we’ll use the
controlsattribute to specify that the play/pause buttons, timeline and volume controls should be shown. In a later tutorial, we’ll make things more fancy by hiding these controls and displaying only a ‘speaker’ icon (like the Warumungu dictionary interface). - Importantly, notice that
audiorequires both a start<audio>and end</audio>tag (unlikeimg). This is becauseaudioallows you to optionally specify multiple sources with various formats (<audio><source src="casa.mp3" type="audio/mpeg"><source src="casa.ogg" type="audio/ogg"></audio>), which we may cover in later tutorials.
Adding media alongside text
Single word, hand-entered
To keep things interpretable, let’s first start by manually creating the HTML for just one entry, casa (house). Once we’re comfortable with this manual, hand-typed version, we’ll then create the a dynamic version using a Javascript loop as we did in the last tutorial.
<style type="text/css">
div.container {
   border: 1px solid black;
   padding: 10px;
   text-align: center;
}

span.headword, span.ex {
   font-weight: bold
}

span.te, span.def {
   font-style: italic;
}
</style>

<div class="container">

    <img src="https://fauxneticien.github.io/13to33/assets/imgs/13.4_2025-04-26_01-casa.png" width="300"><br>

    <span class="headword">casa</span><br>
    <span class="def">house</span><br>

    <audio controls src="https://fauxneticien.github.io/13to33/assets/audio/13.4_2025-04-26_01-casa-word.mp3">
    </audio><br >

    <span class="ex">Este es mi casa</span>.<br>
    <span class="te">This is my house.</span><br>

    <audio controls src="https://fauxneticien.github.io/13to33/assets/audio/13.4_2025-04-26_01-casa-sentence.mp3">
    </audio><br >

</div>
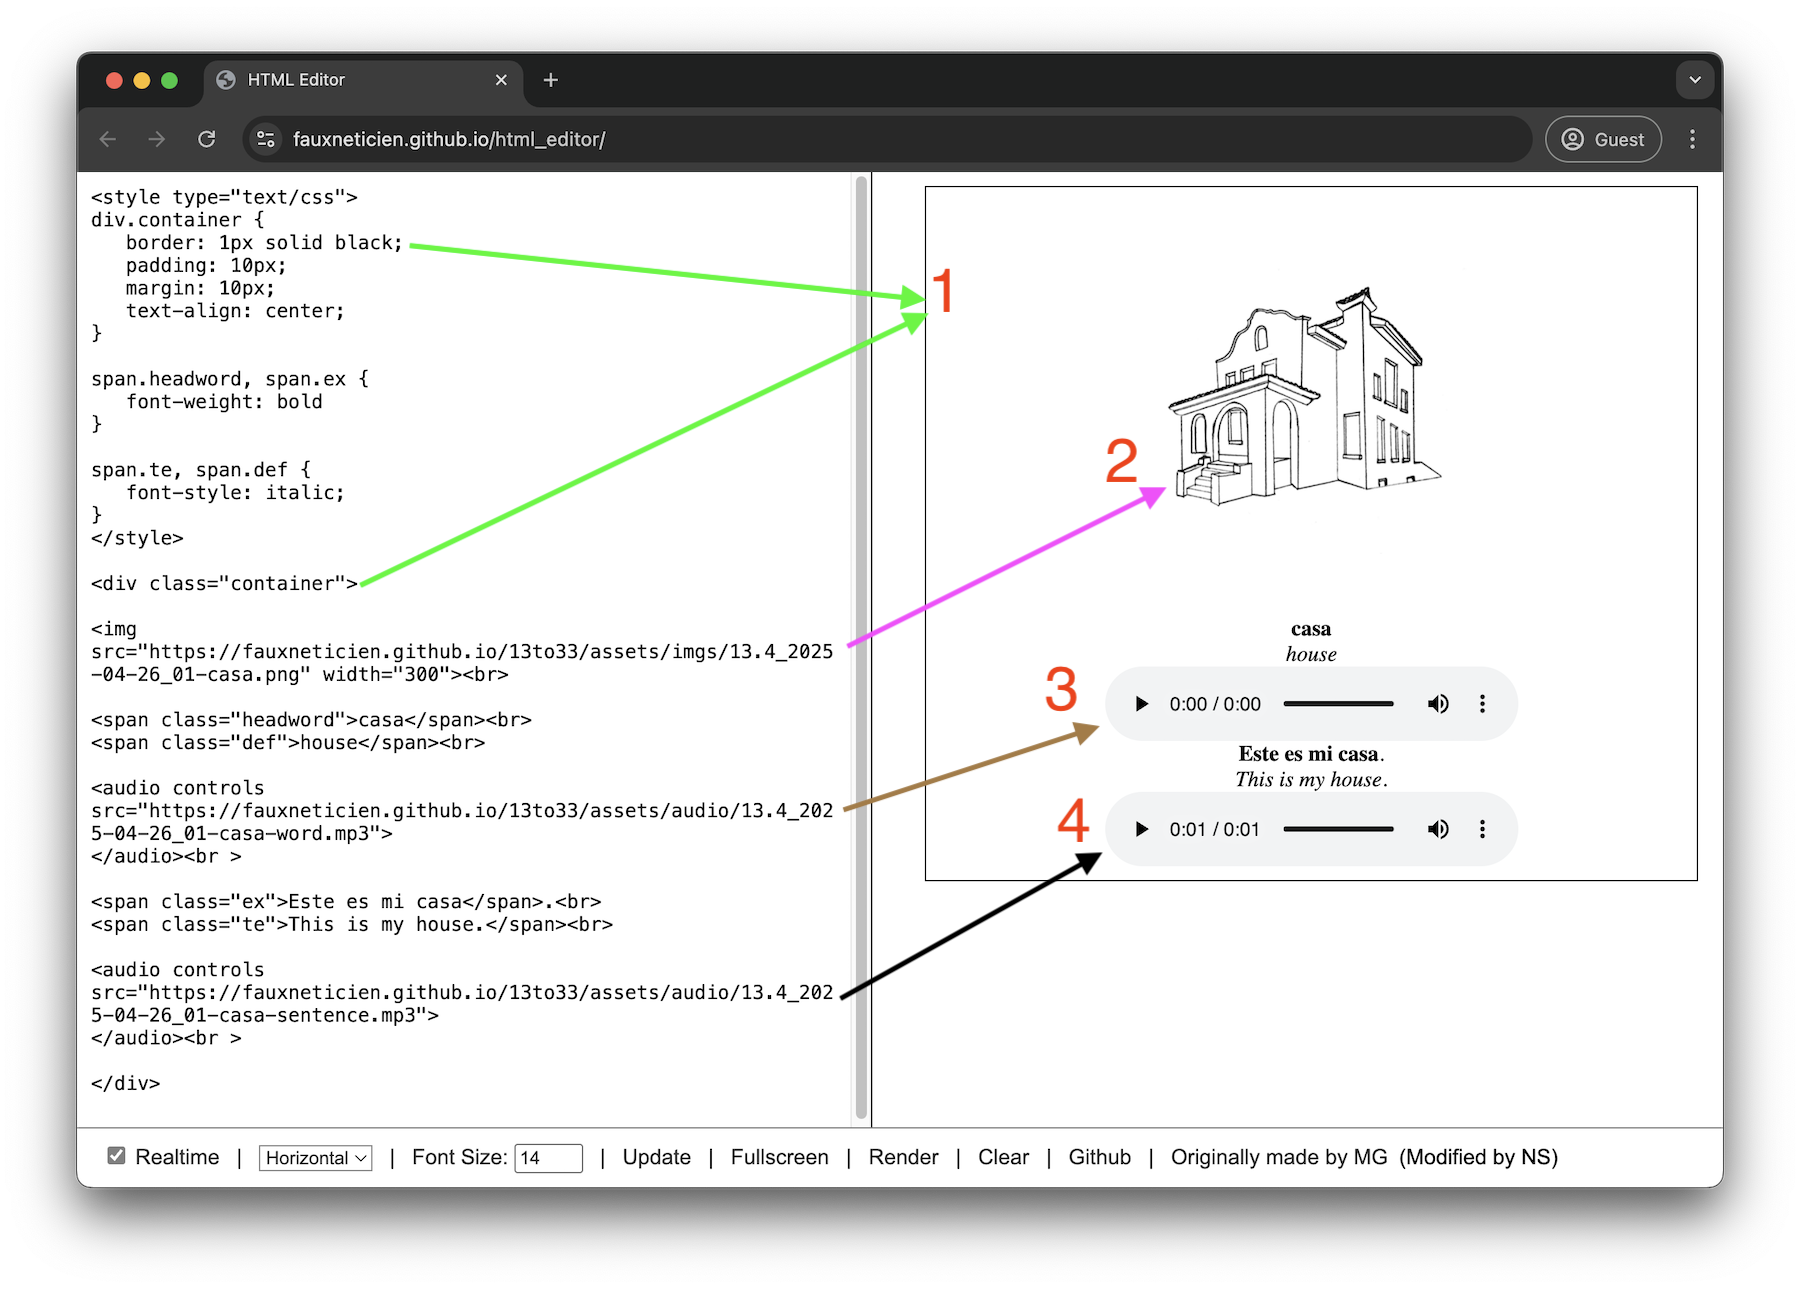
Let’s go over some of the new(er) things in detail (the use of span classes and CSS to style them should look familiar!).
- We’re using a
divor ‘division’ tag to create a section for a single word, and then styling it visually with a black border and spacing and making everything inside it centered. - We’re using the
imgtag to display an image. - We’re using the
audiotag to display audio for the headword casa. - We’re using the
audiotag to display audio for the example sentence Este es mi casa.
Multiple words, dynamically generated
Most of the code below will already be familiar to you from our last tutorial.
As we did before, we are using a loop to iterate over each item in various arrays (dictionary_words, dictionary_defs, etc.).
The main thing that we have changed what is displayed (i.e. at the bottom where document.getElementById("dictionary_display").innerHTML is updated).
<style type="text/css">
div.container {
   border: 1px solid black;
   padding: 10px;
   margin: 10px;
   text-align: center;
}

span.headword, span.ex {
   font-weight: bold
}

span.te, span.def {
   font-style: italic;
}
</style>

<div id="dictionary_display"></div>

<script type="text/javascript">

dictionary_words = ["casa", "perro", "pollo"]
dictionary_defs  = ["house", "dog", "chicken"]
dictionary_exsts = ["Este es mi casa", "Este es mi perro", "El pollo es grande"]
dictionary_extrn = ["This is my house", "This is my dog", "The chicken is large"]

for (index = 0; index <= 2; index++) {

   headword = dictionary_words[index]
   headword_image_url = "https://fauxneticien.github.io/13to33/assets/imgs/13.4_2025-04-26_01-" + headword + ".png"
   headword_audio_url = "https://fauxneticien.github.io/13to33/assets/audio/13.4_2025-04-26_01-" + headword + "-word.mp3"
   sentence_audio_url = "https://fauxneticien.github.io/13to33/assets/audio/13.4_2025-04-26_01-" + headword + "-sentence.mp3"

   document.getElementById("dictionary_display").innerHTML += `
      <div class="container">
         <img src="${headword_image_url}" width="300"><br>

         <span class="headword">${headword}</span><br>
         <span class="def">${dictionary_defs[index]}</span><br>

         <audio controls src="${headword_audio_url}">
         </audio><br >

         <span class="ex">${dictionary_exsts[index]}</span>.<br>
         <span class="te">${dictionary_extrn[index]}</span><br>

         <audio controls src="${sentence_audio_url}">
         </audio><br >
      </div>
   `;
}

</script>
One technical thing I’ve changed from the last tutorial is the use of a Javascript Template String (via the backticks ` ... `), which simplifies stitching together HTML and Javascript.
Aside from this change, you can see that we are simply taking the headword, e.g. casa and deriving three sources:
- Headword image:
https://fauxneticien.github.io/13to33/assets/imgs/13.4_2025-04-26_01-casa.png - Headword audio:
https://fauxneticien.github.io/13to33/assets/audio/13.4_2025-04-26_01-casa-word.mp3 - Sentence audio:
https://fauxneticien.github.io/13to33/assets/audio/13.4_2025-04-26_01-casa-sentence.mp3
Once derived, we can just display the media using the appropriate img or audio tags in HTML.
Afterword
While the display of the prepared data is pretty straightforward, this relies on the fact that the lexicon data along with the images and audio have been pre-prepared. All that the display code is doing, is displaying the data contained in each row of the table below according to a set template.

Comparatively speaking, 90% of the work will be data processing and 10% (if that) will be display. Moreover, if the data has not been processed properly (formatting mistakes, missing files, typos), it may well break the display code and nothing will get displayed. So in the next set of tutorials, we’ll focus on how we get from potentially messy, disorganised sources into tidier derivatives that we can display easily.